I graduated from DeVry in 1986 and spent close to 10 years working as a technician at Digital Equipment Corporation and Texas Instruments. My hobbies switched from building microprocessor projects (Z80 and 8085 back then) to running a Bulletin Board that was one of six main distribution points in the 124 Net distributing echo mail. It was during this time I learned C programming. Boy did I think C was great having been trained in Assembly Language!! In the Mid 90's we saw the internet boom and I found myself doing local area networks then enterprise support.
In the Fall of 2015 the maker movement caught my attention so I grabbed my first Arduino kit in October, breaking a 20 year fast from component level. I hardly made it through fading an led when the librarian at school said she needed to count how many people enterred the library on a daily basis. I researched what Infrared transmitters and receivers were available and also learned about Ken Shirrifs IR Library.
Using his IR Library I set up a beam break detection system to count people passing through the door and displayed the count on an LCD display.
Next, I took some old clarion controller and using the IR Library recorded all the codes it sent then used it to play tunes with. Now this brought my first library problem because the IR Led library wanted to use the same Timer that the Tone function uses. This created issues that had to be resolved by digging into the library header files and finding where the author would allow me to redefine which timer was being used. Here is the IR Music project.
Next I ordered one of the Parallax robot kits and after putting it together added the IR receiver to it and wrote a program so I could control it using an IR remote control. Check out my IR controlled robot
Then I got into interfacing the Shift Registers. I first learned about shift registers while attending DeVry back in 85. I had setup a bidirectional shift-register to do a night rider on leds without any processor control. when the circuit powered up a 555 timer would supply a short logic 1 pulse to the input of the shift register, which shifted that logic 1 in as on lights. The longer the pulse, the more sequential lights would come on. The width of the pulse from the 555 could be adjusted which would control how many lights would be turned on in the "eye" that was shifting back and forth. What caused it to go back and forth? When that logic one was shifted all the way to the MSB location of the last shift register it would trigger a flip flop circuit which in turn changed the logic level on the direction pin of the bi-directional shift register so the light pattern would start shifting the other direction.
Side Note: Want to see some cool timing on Shift Registers? Check out this video where I do some fancy foot work with an oscilloscope to capture data being shifted out during an interrupt service routine.
My classmates were stoked with the display and within a couple days someone showed up wanting me to build the real deal for their camaro. So I did, which required installing 24 incandescent bulbs in the grill, transistor driver circuits for each (because the TTL logic could not drive much more than 40ma) then run all the wiring back to the console.
Ok, back to present. I now have the opportunity to learn how to control a shift register with a microcontroller . This time I am not shifting the data back and forth on the shift register but manipulating a long unsigned integer to give the appearance of it shifting back and forth on the leds. Check out my Night Rider Project Here
One day I arrived about an hour before the meetup and decided to wire up a matrix keypad. Easy enough, then I decided to display the key pressed on a seven segment led which I was going to control via a shift register because the matrix keypad was using 7 of my pins and there were not enough pins. So I wired up the 74hc595 to the arduino, which required only 7 pins, then the outputs of the 74hc595 were wired to the seven segment display.
I did use the sample code on arduino.cc along with the library to read the keypad, but all the rest of the code for setting up the correct mapping for the 7seg display and converting the ascii key values were my own. Check out this cool mini project.
Another project is the GPS clock. Originally it was a guide from adafruit but I didn't like having a GPS clock that only displayed time on a seven seg display when there was also cool gps latitude and longitude info. So I got rid of the seven seg display and added the LCD shield with buttons. The LCD shield is built from a kit, no big deal, the majority of the work was knowing what libraries to i[nclude then I changed up the program so it would not only display the time but would also allow me to switch he screen around via the buttons do display latitude and longitude info, speed, or a comical message "this is a clock not a bomb".
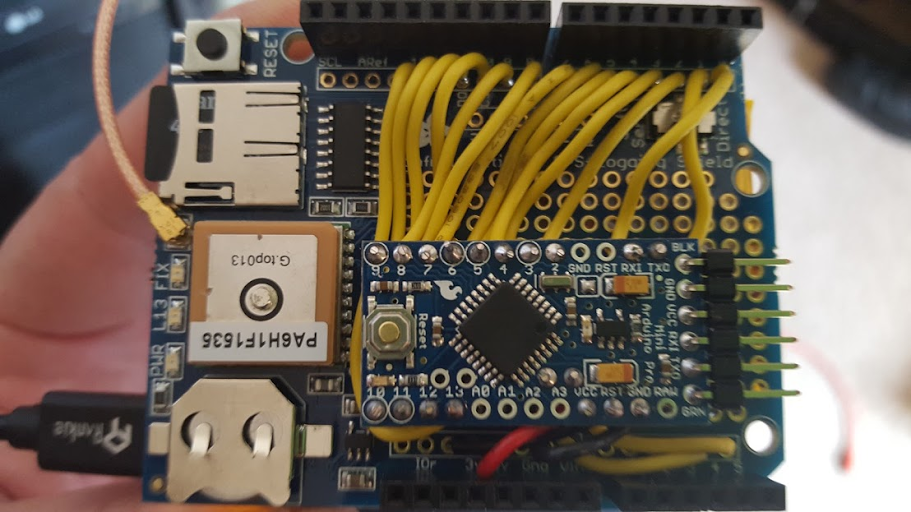
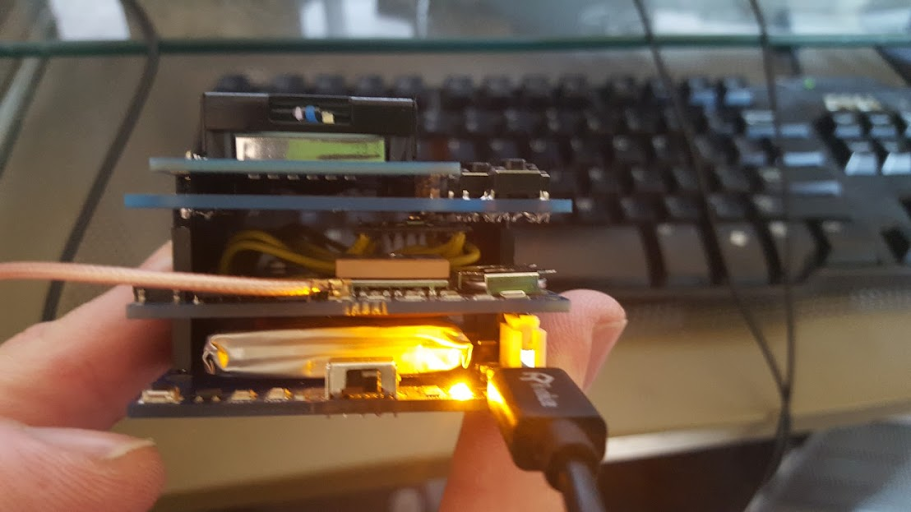
Next on the GPS clock I became annoyed that I was using 4 shields, 1-Arduino Uno, 2 Battery Shield, 3 GPS Shield and 4 the LCD shield. There was some space on the GPS shield for prototyping where I installed an arduino pro mini, thus reducing my shield count.

Note that the pro mini uses A4 and A5 for I2C where the Arduino Uno R3 had those broken out separately. Here is how it lowered the profile:

Here is my blog post on the GPS clock, not this was before I eliminated the need of the Arduino Uno shield
I wanted to control my sparkfun redbot with a joystick. The redbot had a header for the xbee so I used xbee's to do the job. On my joystick shield I ultimately went with two joysticks, interfaced them to the analog input pins and wrote a program to read the joystick positions and transmit them. Mostly that was straight forward once I figured out how to remap the integer value read on the analog ports into a byte value for transmitting (integers are two bytes). The XBee write method takes a byte value so either you unpack the integer into two bytes or do what I did and convert the integer into a byte value of the same proportion by: temp = (float)xval2 / (float)1023; xval2 = 255 * temp;
Then on the receiver (redbot) reverse the operation that was done on the transmitter which gets very close to the original temp = (float)xval / (float)255; xval = temp * 1023;
Learn more about the wireless remote for the redbot project click here and here.
This has been a fast review and get up to speed with AVR processors. Things are certainly easier today with the Arduino environment running on AVR processors than it was 25 years ago using 8085's and Z80's.
Here are a few experiments using the oscilloscope to see what PWM looks like and observe data being shifted out of a 74HC595.
Thank you for taking the time to read and learn more about me and my qualifications. When you come to my meetups you are not going to encounter someone who has merely gone through the experiments of the kit. What you will find is an experienced technician that knows both theory and practical application. I am confident that through participating in my workshop/classes that you will absorb my experience and skills to the point you will surpass me, and that would make me very happy :-)
If you would like to join one of our current meetups click here. If you would like contact me about offering Arduino Step by Step at a different venue click here.