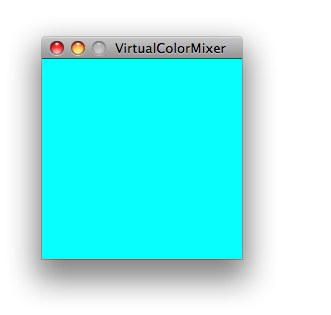
Virtual Color Mixer
This example demonstrates how to send multiple values from the Arduino board to the computer. The readings from three potentiometers are used to set the red, green, and blue components of the background color of a Processing sketch.
Hardware Required
- Arduino or Genuino Board
- 3 Analog Sensors (potentiometer, photocell, FSR, etc.)
- 3 10K ohm resistors
- hook-up wires
- breadboard
Software Required
- Processing
Circuit
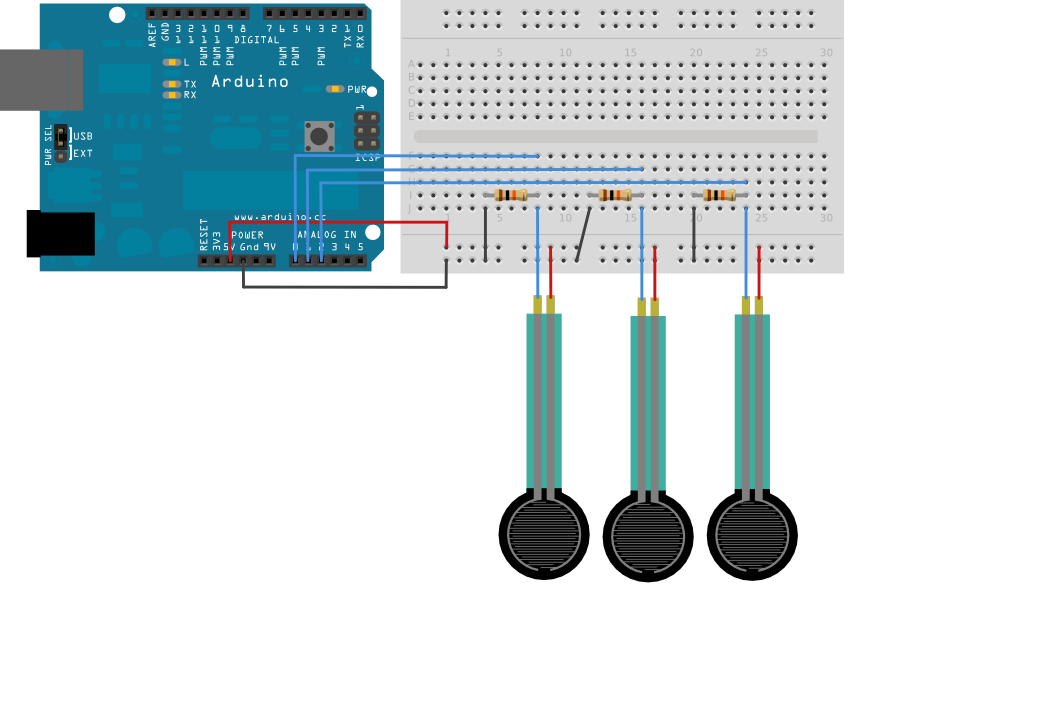
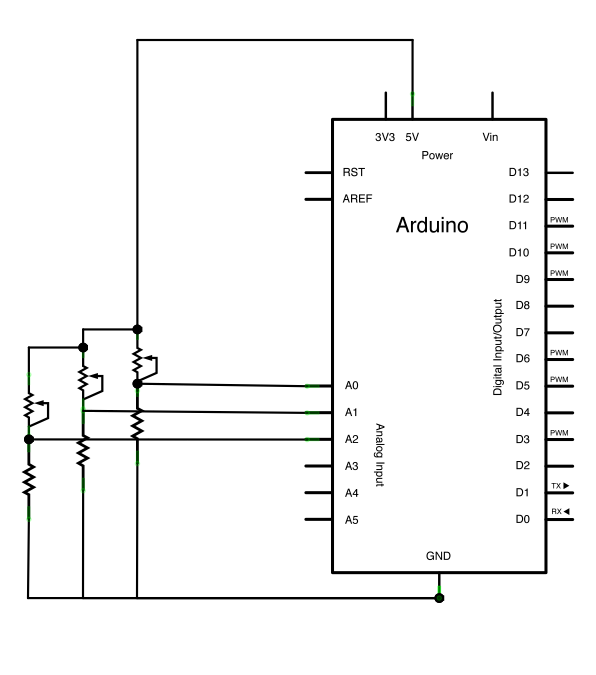
Connect analog sensors to analog input pins 0, 1, and 2.
This circuit uses three voltage divider sub-circuits to generate analog voltages from the force-sensing resistors. a voltage divider has two resistors in series, dividing the voltage proportionally to their values.
Code
/*
  This example reads three analog sensors (potentiometers are easiest)
 and sends their values serially. The Processing and Max/MSP programs at the bottom
 take those three values and use them to change the background color of the screen.

 The circuit:
 * potentiometers attached to analog inputs 0, 1, and 2

 http://www.arduino.cc/en/Tutorial/VirtualColorMixer

 created 2 Dec 2006
 by David A. Mellis
 modified 30 Aug 2011
 by Tom Igoe and Scott Fitzgerald

  This example code is in the public domain.
 */

const int redPin = A0;      // sensor to control red color
const int greenPin = A1;    // sensor to control green color
const int bluePin = A2;     // sensor to control blue color

void setup()
{
    Serial.begin(9600);
}

void loop()
{
    Serial.print(analogRead(redPin));
    Serial.print(",");
    Serial.print(analogRead(greenPin));
    Serial.print(",");
    Serial.println(analogRead(bluePin));
}
Processing Code
As you change the value of the analog sensors, the background color will change:
//  This example code is in the public domain.

import processing.serial.*;

float redValue = 0;        // red value
float greenValue = 0;      // green value
float blueValue = 0;       // blue value

Serial myPort;

void setup() {
  size(200, 200);

  // List all the available serial ports
  // if using Processing 2.1 or later, use Serial.printArray()
  println(Serial.list());

  // I know that the first port in the serial list on my mac
  // is always my  Arduino, so I open Serial.list()[0].
  // Open whatever port is the one you're using.
  myPort = new Serial(this, Serial.list()[0], 9600);
  // don't generate a serialEvent() unless you get a newline character:
  myPort.bufferUntil('\n');
}

void draw() {
  // set the background color with the color values:
  background(redValue, greenValue, blueValue);
}

void serialEvent(Serial myPort) {
  // get the ASCII string:
  String inString = myPort.readStringUntil('\n');

  if (inString != null) {
    // trim off any whitespace:
    inString = trim(inString);
    // split the string on the commas and convert the
    // resulting substrings into an integer array:
    float[] colors = float(split(inString, ","));
    // if the array has at least three elements, you know
    // you got the whole thing.  Put the numbers in the
    // color variables:
    if (colors.length >=3) {
      // map them to the range 0-255:
      redValue = map(colors[0], 0, 1023, 0, 255);
      greenValue = map(colors[1], 0, 1023, 0, 255);
      blueValue = map(colors[2], 0, 1023, 0, 255);
    }
  }
}
Video Demonstration

David Riewe
Published
Sat 12 November 2016
Comments
comments powered by Disqus