Building A 16x32 NeoPixel Display
Earlier this year while attending a FabNow Conferance in Ft. Worth I came across a few exibits with Neo Pixel Rings. I was fascinated with the color levels and the fact they could be controlled with a single wire! While experimenting with the Neo Pixel Rings I learned about Adafruits NeoPixel 64 LED 8x8 Matrix, the FadeCandy controller then was mesmerized by some of the demonstrations at Micah Elizabeth Scotts website and the LED Art with Fadecandy tutorial on Adafruits website.
I was hooked. I knew I wanted to build some sort of display using the 8x8 neopixel panels and control them using the FadeCandy! Using the LED Art with Fadecandy tutorial on Adafruits website as I guide I thought I would start off with four of the 8x8 neopixel panels but then decided to go with eight so I either build two separate 2x2 panel displays (16x16) or one larger 16x32 display.
Parts List
- Adafruit NeoPixel NeoMatrix 8x8 - 64 RGB LED Pixel Matrix
- FadeCandy - Dithering USB-Controlled Driver for NeoPixels
- 5V 10A switching power supply
- Each of the 8x8 Panels can draw up to 3.5 amps if all LEDs are turned on full white. Two 10amp supplies were purchased so that I would have ample power to supply four of the 8x8 matrixes.
- I also picked up some stranded wire from Tanner electronics. 16 gauge was used to provide main power to each of the panels and 22 gauge was used for the data signals from the Fadecandy to the 8x8 panels.
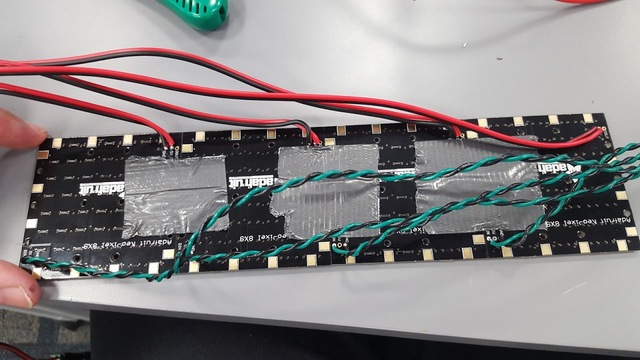
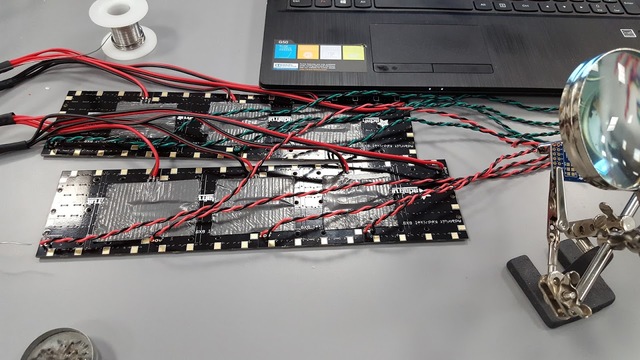
With parts in hand I started out by wiring up four of the 8x8 panels. The wires on the top, running to the left, are 16 gauge stranded wire and will be combined into a barrel connector that will connect with a 5volt 10 amp supply. The wires on the bottom bring the signal and ground from the fadecandy controller. The twisting of the wires was dones simply to keep things neat. I used masking tape along with toothpicks to provide some structural support until I would be ready to mount the panels.
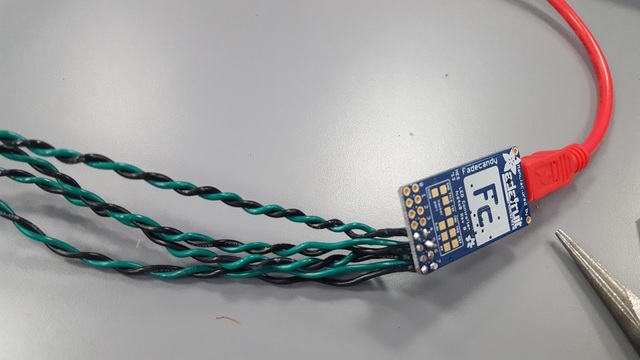
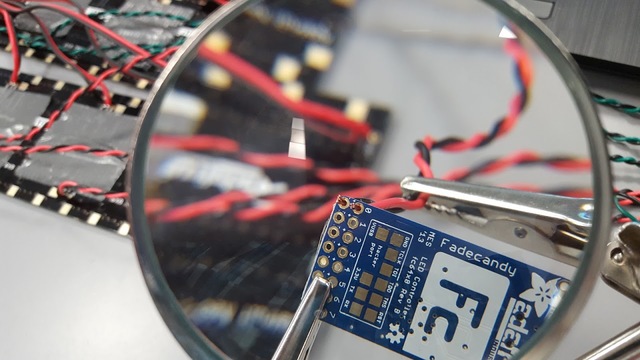
Here is a closer look at the Fadecandy controller.
1x4 Rear View
Construction Of Panel
With both 1x4 panels wired up it is time to get ready for mounting to a permanent base. I chose a sheet of plexiglass I had lying around that was 1/8" thickness. Prior to starting the build I had laid all eight panels out on a xerox machine and produced a outline of where all the holes in the pc boards were located. Using this as a guide I drilled holes int he plexi-glass for mounting the 8x8 matrix panels.
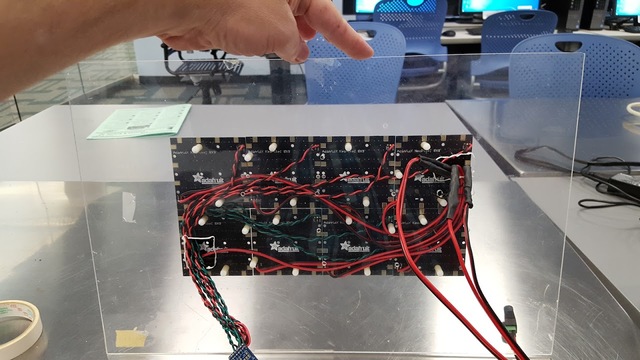
Rear view of mounted panels
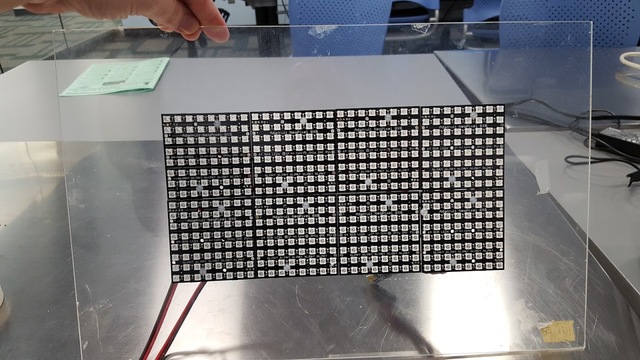
Front view of mounted panels
Here is a short video of the 16x32 panel without any diffuser
Here is a short video of the un-diffused 16x32 responding to some music
At this point I was still un-decided where to go next. One option was to use the extra space on the plexiglass to mount suction cups that would allow mounting the display to the glass wall of the North Branch Library makerspace. Realizing I needed some sort of diffuser I started looking into different shadow boxes at local arts and crafts store. I one which would allow the 2x4 panels to fit nicely inside. I used my drimmel to carefully cut away the extra plexi-glass, allowing the display to fit inside of the shadow box.
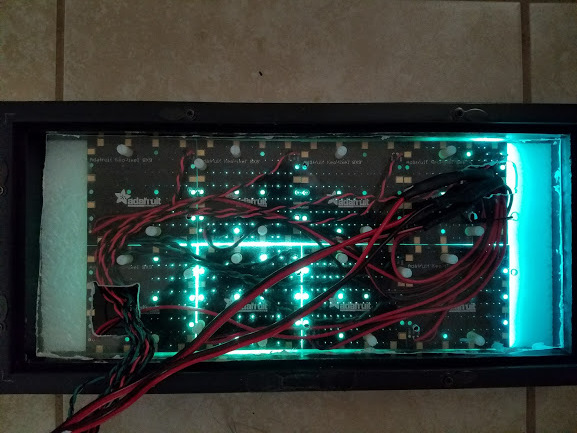
For a difusser I went to Lowes and found an overhead flourescent light diffuser panel that was chipped (the chip allowed me to negotiate a better price). I used a right angle to mark the outline of the section I would need to cut out with a marker then used a fine tip soldering iron to go over the lines slowly until I had burned and etch over half way through. I ended up needed three of these to get the level of diffusion that I was satisfied with.
Here is the 16x32 with diffusers in place running a rings algorythm
Here we have some cool trails
In a follow up post I will go into more detail on how we control the display via the Fadecandy controller using any programming language that can write to a web socket.
For now I would encourage you to take a look at the Fadecandy Repo on Github

David Riewe
Published
Sun 30 October 2016
Comments
comments powered by Disqus